Hello dear polymer clay enthusiast!
I absolutely love this time of year! Christmas lights, sparkling decorations, and snowy landscapes make everything feel magical. I’m so lucky to live in a place with one of the most magical Christmas markets!
Every year, I’m completely enchanted by the cozy Christmas ambiance—the twinkling lights, the carols filling the air, and the warm, spicy scent of mulled wine. It’s such a magical feeling, and I hope I never lose this childlike wonder! 🎄 ❄️✨
Today, I’m bringing that festive magic to life with a Christmas-inspired polymer clay tutorial! In this step-by-step video, I’ll show you how to create adorable polymer clay wreath earrings. Using a metal hoop as the base, we’ll craft vibrant green leaves, add tiny red clay “baubles,” and top it off with a touch of white glitter embossing powder for that perfect snowy effect.
This project is super versatile—you can transform the wreath into a pair of earrings, a stunning pendant, or even a matching jewelry set!
Here’s what you’ll need for this holiday-themed design:
🎄 Green polymer clay
🎄 Cadmium red polymer clay
🎄 19-gauge wire
🎄 Round nose pliers and flush cutters
🎄 Wow white glitter embossing powder
🎄 Transparent ink and a heat gun
🎄 A round cutter to match the hoop size
🎄 A needle tool for shaping and texturing the leaves
And of course, you’ll have to bake your pieces in the oven.
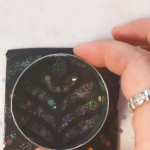
The real magic in this project comes from the white glitter embossing powder—it’s like sprinkling a touch of snowy sparkle onto your designs! It’s my secret ingredient for making stunning Christmas or winter-themed polymer clay jewelry.
Whether you’re making gifts or stocking up your own festive collection, this tutorial is perfect for beginners and seasoned clayers alike. I can’t wait to see how you use this inspiration in your work!
Step-by-step instructions
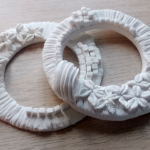
- Create the Wreath Base
- Condition green polymer clay thoroughly.
- Roll and cut a half-moon element of clay and wrap it around the hoop to create a smooth base.
- Texture the back of the clay base lightly with a craft knife handle for a clean finish.
- Make and Attach Leaves
- Roll small bits of green clay into oval shapes and flatten them.
- Use a needle tool to create vein patterns (centerline with small lines branching out).
- Arrange the leaves organically on the hoop, overlapping for a natural effect.
- Press each leaf firmly into the base to secure it.
- Add Decorative Red Beads
- Roll conditioned red polymer clay into small round beads (representing holly berries or ornaments).
- Attach three red beads at the top of the wreath and press gently to secure.
- Bake the Earrings
- Bake the earrings at the temperature recommended by the polymer clay manufacturer (typically 265°F/130°C) for 30 minutes.
- Allow the earrings to cool completely before proceeding.
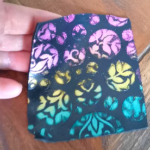
- Add Glittery Snow Effect
- Use a transparent ink pen to apply adhesive in areas where you want the glitter effect.
- Sprinkle snow glitter embossing powder over the inked areas, collecting excess powder for reuse.
- Heat the glitter with a heat gun until it melts and sets.
- Repeat the process for additional layers if desired.
- Create the Earring Finding
- Cut a piece of 19-gauge wire and straighten it.
- Use round-nose pliers to form a loop and attach it to the hoop.
- Shape the remaining wire into an ear wire using flat-nose pliers for bends and adjustments.
- Final Touches
- Inspect your earrings for balance and finish.
- Ensure all attachments are secure before wearing or gifting.
Happy claying and Merry Christmas crafting!
Mihaela🎅🎨