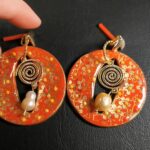
Easy and fun curled clay beads turned into Clay Art Earrings
Hello, dear polymer clay enthusiast!
Today, I am excited to inspire you to take out your clay extruder and load it with colorful clay:).
I have to tell you a secret: the faux ceramic effect was totally unintentional (but I loved it, of course) and it really turned these beads into stunning art clay earrings.
This project is not only fun but also easy. Yes, I really think clay is supposed to be easy and fun🎉
Let me show you how to make beautiful and colorful curled clay beads! Yummy – yummy!
So, grab your clay extruder, colorful polymer clay, and let’s get started!
- Materials You’ll Need
To begin, gather the following materials:
Polymer clay (Fimo Professional True Yellow, Fimo Professional Magenta, and Cernit Number One Blue) Clay extruder and an elongated rectangle disc
Metal eye pins (gold color)
Metal frames for earrings and earring findings
UV resin and UV lamp and a brush
Thin wire (3mm, 22 or 24 gauge, gold color)
Drop beads and seed beads
Basic clay tools (blade, roller, tile, and baby wipes, oven)
pliers and flush cutters for the wire
Step 1: Condition Your Polymer Clay
First and foremost, properly conditioning your polymer clay is essential. This step ensures the clay is pliable and ready for intricate work
Roll Each Color into a Log: Start by rolling each color into a log.
Combine the Logs: Next, place the three logs together and roll them into a single, thin log that fits into your clay extruder.
Step 2: Load the Clay Extruder
Now that your colorful log is ready, it’s time to load it into the clay extruder
Prepare the Extruder: Use a disc with an elongated rectangle shape for the extruder
Insert the Clay Log: Load the log into the extruder. It might not look pretty at first, but keep extruding until you see the beautiful blend of colors starting to emerge
Extrude the Clay: Continue extruding the clay, observing the gradual changes in color.
Step 3: Cut and Shape the Clay
Once you have your extruded clay, it’s time to shape it into beautiful earrings.
- Select the Best Part: Identify the section of the extruded clay with the most appealing color blend. For my project, I used a part with a mix of magenta, green, blue, and yellow.
- Cut the Clay: Cut a length that will be enough to make two curled beads for the earrings.
Step 4: Prepare the Eye Pins
Next, we’ll prepare the eye pins to attach the clay pieces to the earring frames.
- Insert the Eye Pins: Take the gold-colored eye pins and wrap them in a small piece of yellow polymer clay. Ensure that one part of the round element remains open to attach to the jump ring or wire later.
- Embed the Eye Pins: Embed the eye pins into the clay, ensuring they are securely placed.
Step 5: Curl the Clay
Now comes the fun part – curling the clay!
- Curl the Clay: Begin curling the clay into a bead shape, overlapping the sides slightly. Decide whether you want the magenta or yellow color in the center. I chose magenta for a vibrant pop of color.
- Insert the Eye Pins: Insert the eye pins into the ends of the curled clay piece, ensuring they are well-positioned and secure.
Step 6: Bake the Polymer Clay
With your pieces shaped and ready, it’s time to bake them.
- Preheat the Oven: Preheat your oven to the recommended temperature for your polymer clay brand.
- Bake the Pieces: Place the clay pieces on a baking tray and bake for 30-40 minutes. Let them cool completely before proceeding to the next step.
Step 7: Apply UV Resin
Even though polymer clay doesn’t need sealing, I love adding a shiny finish with UV resin
- Apply UV Resin: Use a brush to apply a thin coat of UV resin over the baked clay pieces.
- Cure with UV Lamp: Cure the resin under a UV lamp for two consecutive minutes.
Step 8: Assemble the Earrings
Finally, it’s time to assemble your earrings and add the finishing touches.
- Prepare the Wire and Beads: Cut thin wire and thread it with drop beads and seed beads to create an interesting decoration.
- Attach the Beads to the Clay: Insert the wire-wrapped bead decoration through the hollow part of the curled bead and secure it through the eye pin.
- Connect to the Metal Frame: Connect the eye pin to the metal frame of the earring.
- Attach Ear Wires: Finally, attach ear wires to complete your earrings.
Conclusion
As always I hope you liked this idea and that you’ll take this inspiration and use it in your work with clay!
Happy claying, and have a beautiful and creative week!
Mihaela


