Hello dear polymer clay enthusiast, for today’s today I decided to show you the step-by-step process of making an image transfer clay cuff. And I’ve chosen a beautiful Asian-inspired design (that I generated using AI art) that I printed on a Laser printer as well as a paper template with 3 arches to use in the process.
I’ve filmed the entire process of making a stunning looking Image transfer polymer clay cuff and I had to use relaxing music and on-screen written messages to give further pieces of advice because I cannot speak much without coughing a lot (it’s just a seasonal flu).
And yes, image transfer is something I particularly like to do. And I’d love to inspire you to use this great technique to make gorgeous clay pieces. And I hope that this video is going to be relaxing for you, especially that I had to replace my voice over with relaxing music. I’ve got the seasonal flu and I caught a lot….
Here’s the Material List:
white polymer clay on setting no. 4 (Atlas Pasta Machine)
Laser -printed image and print out of the frame – Click here to to download your free Canva template with this image, get your copy of the Ultimate Guide for Polymer clay and become a Clay Insider and receive even more clay tips!
stencil
gold mica powder
texture plate to texture the back
black mica powder
brushes
polymer clay tools: blades, craft knife, smoothing tools
rubbing alcohol
larger round cutter or a flexible blade
fan-shaped cutter
soda can wrapped in paper
oven
UV resin and a UV lamp
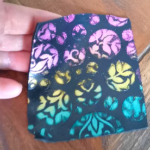
So I picked a really pretty Chinese-inspired design that I printed on my Laser printer and it’s a triple image that works great for lengthy clay items like cuffs:) And guess what? On the back of it, I used this fancy texture like a mandala. And I have to tell you that I’m very pleased with how the bracelet turned out.
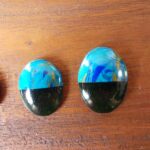
So I used 3 clay pieces that I passed on the setting no. 4 of my Atlas pasta machine. I’m working with white clay and I love the contrast between the white areas and the colorful pattern of the transferred image. I’ve made a template in Canva that you can download and use in your work (here’s the link to the Canva template) and I adjusted the length of the cuff to my wrist.
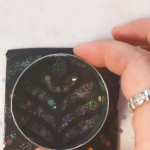
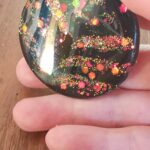
Then I printed the image and the template (that I’m going to use to make the upper layer of the cuff). So after transferring the image onto polymer clay (using rubbing alcohol as the transfer medium), I used a beautiful texture plate with a mandala design to texture the piece that I’m going to use to make the back of the cuff. I used black mica powder to accentuate some details that did not transfer so well (not enough burnishing in those areas:)
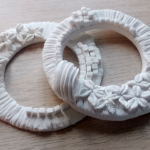
Then I applied the layer with the image transfer on top, gently pressing everything together using parchment paper. Then I prepared the third layer, cutting openings to make the transferred areas visible and using a beautiful fan-like stencil and gold mica powder to turn this simple cuff into a work of art. I applied this third layer on top of the 2 previous one and I gently pressed everything together using parchment paper.
Then I put the cuff on top of a soda can wrapped in paper (because I am making the front and the back of the cuff in the same time and this avoids ending up with a glass-like look on the back of the piece). I baked the piece for 45 minutes at the recommended temperature on parchment paper. I took it out of the oven when it was still slightly warm, being very careful not to burn mu fingers and I continue to shape it and close it a little bit more.
I let the clay cool down and then I applied UV resin on top. I braced the cuff and I applied UV resin on one side. I cured the resin with a UV lamp for 2 minutes and then I continue with the next area and I finished with the other side of the cuff. Personally I just love how this cuff turned out and I encourage you to try this idea in your work and also share your impressions with me!
Happy claying!
Mihaela P.S.
Click here to learn more about Image Transfer onto polymer clay and what transfer media to use for best results!